Post by sadface on Aug 15, 2022 19:46:50 GMT 12
G'day Guys,
I also had a bit of time to play with my sheet metal bender.
Here's the beauty, crudely clamped to a bench with some quick clamps.
And here is some test folds on an off cut.
I think I will do another folding experiment before I do it for real on a work piece. I need to understand how the metal stretches etc around the fold so I can more reliably get the dimensions I want.
All in all it was a great weekend with some good progress.
|
Post by RdM on Aug 15, 2022 21:42:55 GMT 12
I think I will do another folding experiment before I do it for real on a work piece.
I need to understand how the metal stretches etc around the fold so I can more reliably get the dimensions I want.
Some results on a search like this might be useful?
|
Post by sadface on Aug 16, 2022 20:26:17 GMT 12
Thanks for that.
I found a good calculator and got my head around the parameters.
I would have guessed 2mm bend deduction base on my test folds.
According to a couple of different calculators, it is 1.89mm
|
Post by sadface on Aug 30, 2022 21:03:34 GMT 12
G'day Guys,
I was allowed a bit more time on the weekend to do some cutting and drilling.
I've also being doing some maths on exactly what dimensions I want my chassis. I had originally come up with 430mm wide x 250mm deep x 100mm tall. What I hadn't thought of was how all the folds and material etc would affect things.
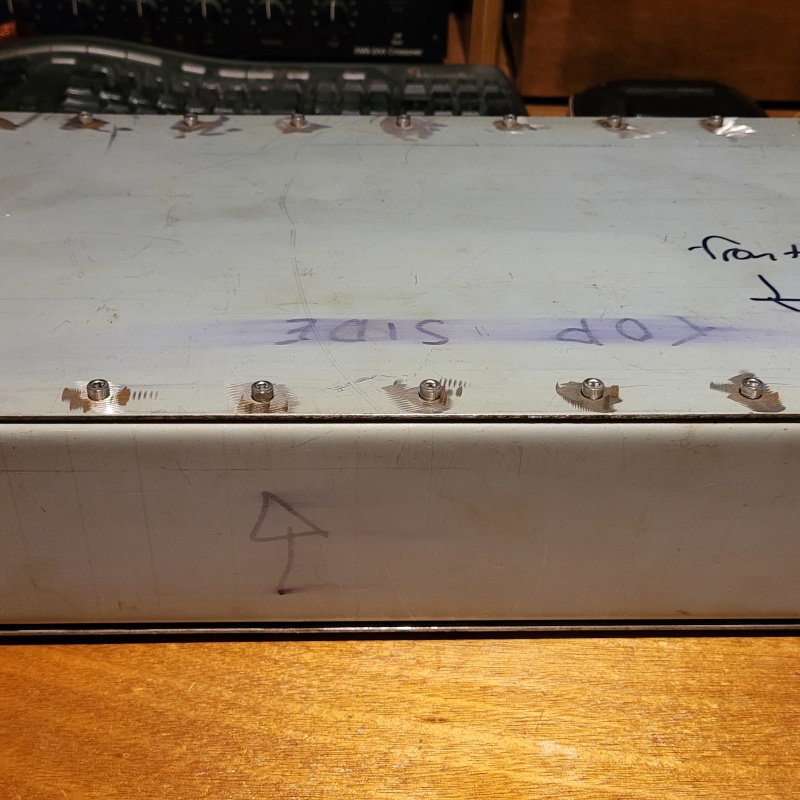
After much thinking, starring and measuring I decided that the OD needs to be the 430x250x100.
So for the height, take off 2x 2mm for the top and bottom sections, take off 2x 1mm for the flanges on some rivet nuts, take off 2x 2mm for the folds.
Leaving the ID of 90mm for an OD of 94mm for the folded side sections.
Similar stuff with the vertical folds on the front and rear sections with a small change for the 1.2mm steel instead of 2mm.
There was also the question of how much material to remove from the corners of the front and rear sections so that the vertical folds can be done.
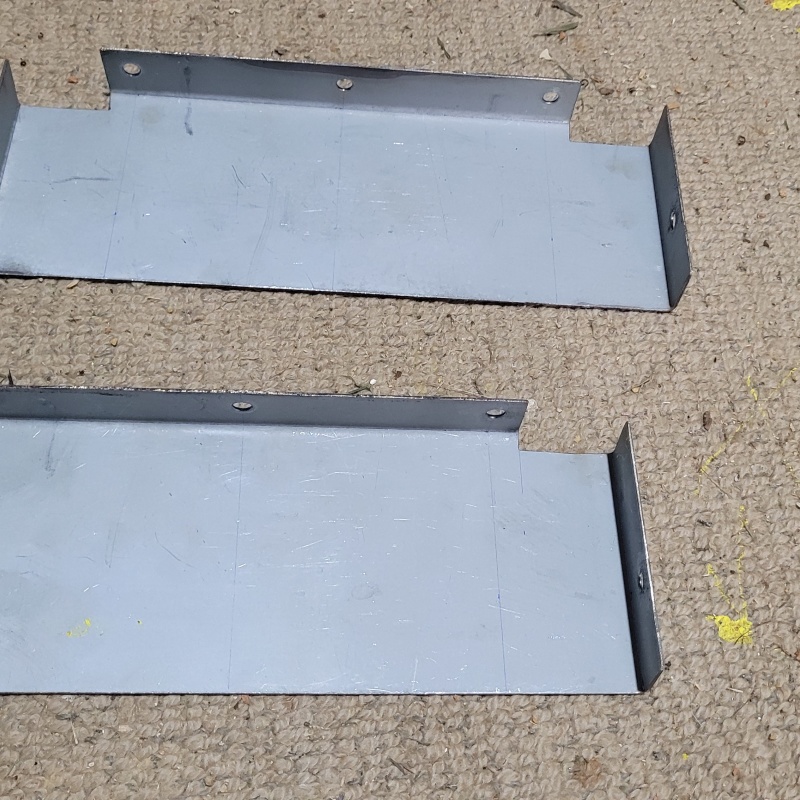
So here we arrive at this evenings, folding experiment on some more off cuts. I also took the chance to do an experiment with some drill holes close to the fold to see if there was any stretching or warping around the fold. I think it will be easier to drill the sheet when flat rather than trying to drill onto the flanges after it has already been folded.
   
Thankfully, all my maths has worked out. The dimensions are all as predicted.
Also as I was hoping, the 6mm holes have not stretched or warped in anyway.
All in all, a huge success.
I can now proceed to make the last cuts and start on the extensive process of hole creation.....
|
Post by sadface on Oct 25, 2022 19:47:28 GMT 12
G'day Guys,
A wee update.
I've finally had the time do cut out all of the sections for the chassis on the weekend.
I've also folded them.
Top and bottom sections. 2mm steel here.
Sides. 1.2mm
Front and back. 1.2mm
All centre punched out ready for the first round of drilling.
I was a little bit rushed on the cutouts to work around the side folds on the front and back so they are a little bit 'rough' that is not exactly perpendicular and one or 2 of them are a mm or so out.
We'll see if this causes any issues once I get them all drilled up ready for test assembly. I didn't leave much tolerance as I wanted a really nice tight fit so we will see how I go.
If this one doesn't come out perfect, it wont be the end of the world as its all practice for more important stuff in the pipeline.
|
Post by sadface on Feb 4, 2023 21:23:05 GMT 12
G'day Guys,
This one has taken much much longer than I thought it would. Surprise surprise!
I've learned a few things.
I will probably use less fasteners the next time around.
I will take a bit more care with my hole centres...
I will also take a bit more care with my folds.
Wandering hole centres and folds that are a bit past 90 degrees made for a lot of fetting. Which was also compounded by the number of fasteners. 48 m4 bolts in total.
Now I can get onto the fun stuff of filling it with preamp!
|
Post by colinf on Feb 5, 2023 19:57:01 GMT 12
It doesn’t look like it will fall apart in a hurry.
AMR-iFi R&D
|
Post by sadface on Feb 5, 2023 21:40:53 GMT 12
No I don't think it will fall apart quickly....
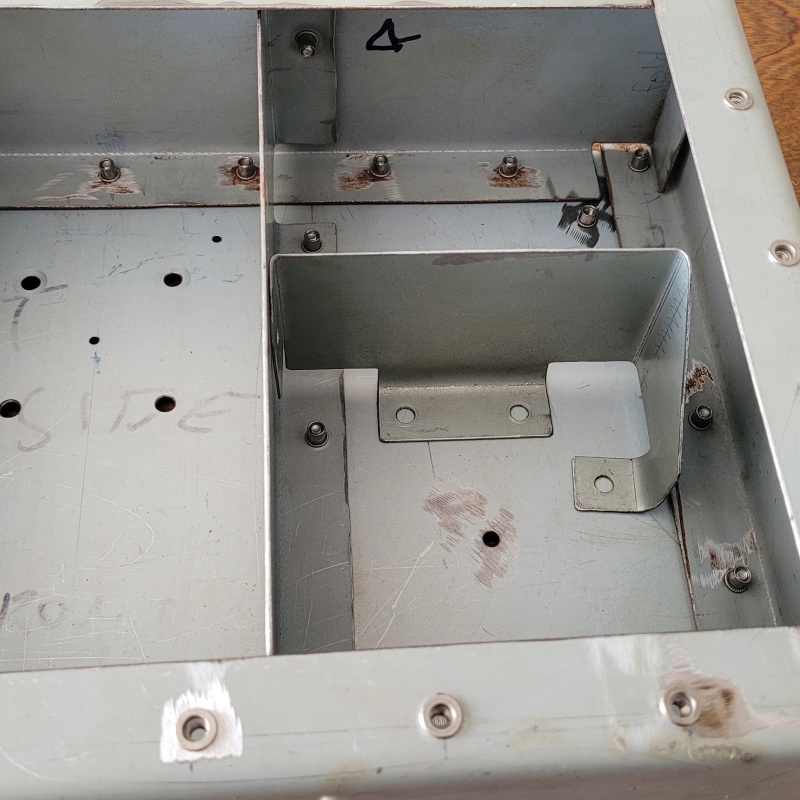
Here's the first draft of the layout in the new chassis.
The volume pot will be on a shaft. I need to sort out a bracket to mount it.
I think I have one of the standard brackets from a cheap shaft extension kit. However I'm not sure if it will be tall enough and they are quite flimsy. It might be something I have to fabricate.
I am also considering putting a shield in between the transformer and the rest of the contents.
The next round of drilling and cutting begins!
|
Post by RdM on Feb 6, 2023 20:44:07 GMT 12
It still looks like a tortuous way to make a chassis, to me.
Although I am going to attempt to fabricate a top for the A&R HA10 MC preamp mentioned elsewhere!
Because I've still harboured desires to make a valve amp or two, I've saved some ready made chassis over the years, tech dumpster dives, and must take pics of them.
Perhaps easier to adapt a ready made one.
Anyway, great to see the larger pics!
|
Post by sadface on Feb 7, 2023 21:26:50 GMT 12
It still looks like a tortuous way to make a chassis, to me. You're right it is tortuous.
I've got some ideas on how to make it easier next time.
It's all in good fun. Good chassis' are expensive and this way I can make them to the exact dimensions I need.
I think the work will really pay off when I get to monoblock power amp chassis'.
Gives me plenty to keep my hands from getting idle.
|
Post by sadface on Feb 19, 2023 20:59:43 GMT 12
G'day Guys,
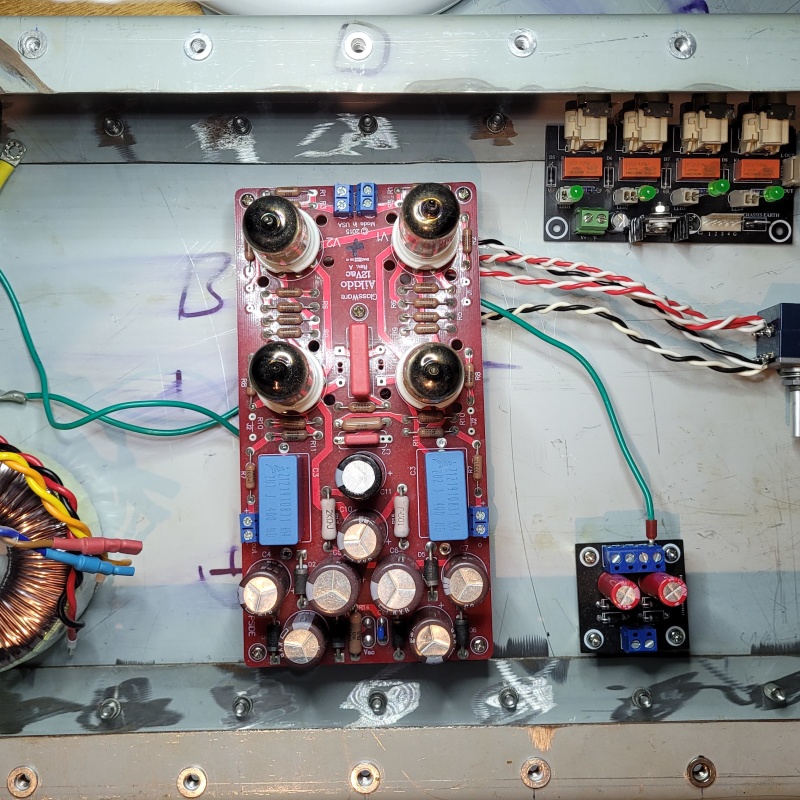
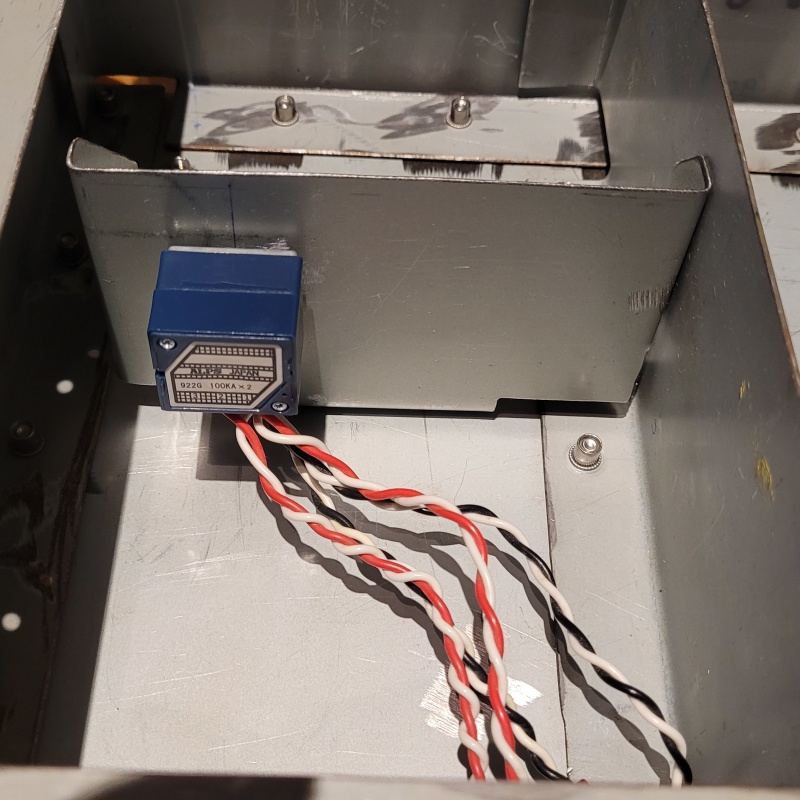
I had a bit of time this weekend to get some work done. All on the bottom plate where all the action happens!
Feet mounted.
Power Transformer mounted.
Earth point locked down.
Main pcb mounted.
I also cut some 1.2mm sheet to make some brackets/shields.
If I am lucky I might have them folded up this week for testing.
|
Pundit

Post by peter0c on Feb 20, 2023 10:05:24 GMT 12
Not scrimping on valves I see. Mil spec CVs no less. I have an Akido and swapping to Mullards certainly made a difference. Good luck.
|
Post by sadface on Feb 22, 2023 19:27:17 GMT 12
Not scrimping on valves I see. Mil spec CVs no less. I have an Akido and swapping to Mullards certainly made a difference. Good luck. Yeah, they are great tubes. There was a gentleman selling them on trademe a few years ago for something like $25 each.
They made a huge difference as driver tubes in my Monoblock.
I also noticed a big difference when i switched from some new production tung sols that I used to test this preamp after initial construction.
I had one of those fun moments last night.
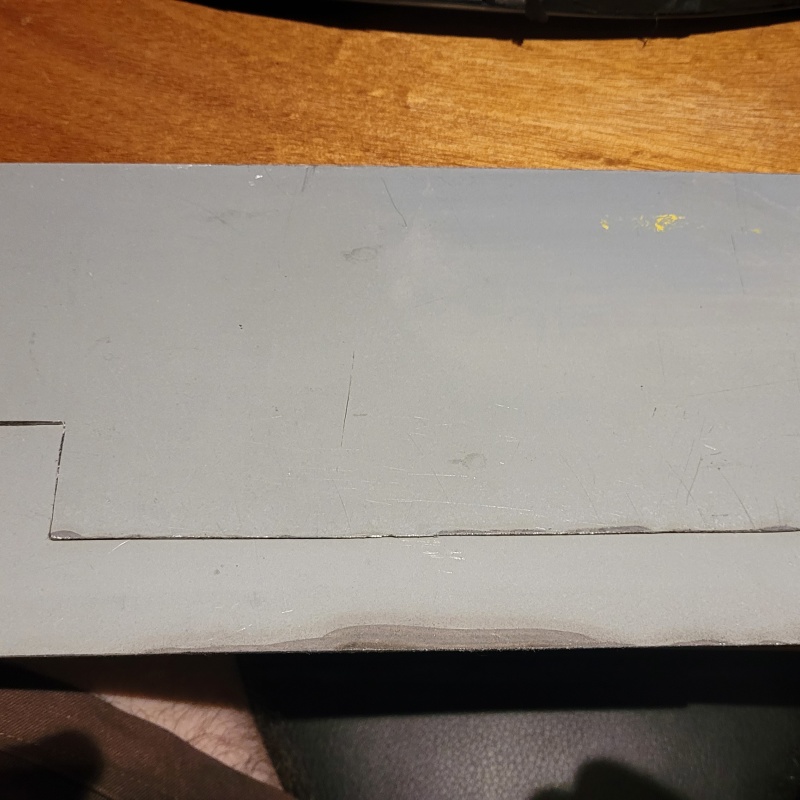
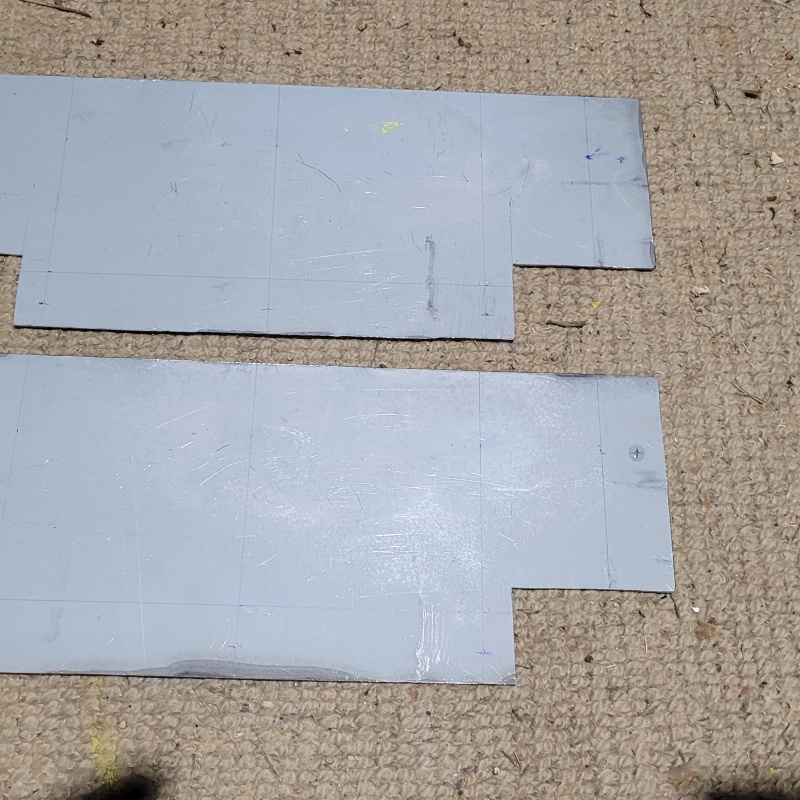
When I was cutting the sheet to make some brackets. I did some quick calculations in my head on the corner cutouts to work around the folds.
It turns out my quick mental maths did not include all the relevant factors.
I will need to chop off another 20mm along the long axis at each end. Not a huge deal, 5 minutes with the jigsaw.
However this makes a lot of noise which means I can't do it in my evenings while the toddler is sleeping. Its a weekend only job. I was wanting to do quieter things like drilling and folder this evening.
measure twice cut once so they say....
|
Post by RdM on Feb 22, 2023 21:00:29 GMT 12
Not scrimping on valves I see. Mil spec CVs no less. I have an Akido and swapping to Mullards certainly made a difference. Good luck. Yeah, they are great tubes. There was a gentleman selling them on trademe a few years ago for something like $25 each.
They made a huge difference as driver tubes in my Monoblock.
I also noticed a big difference when i switched from some new production tung sols that I used to test this preamp after initial construction.
I had one of those fun moments last night.
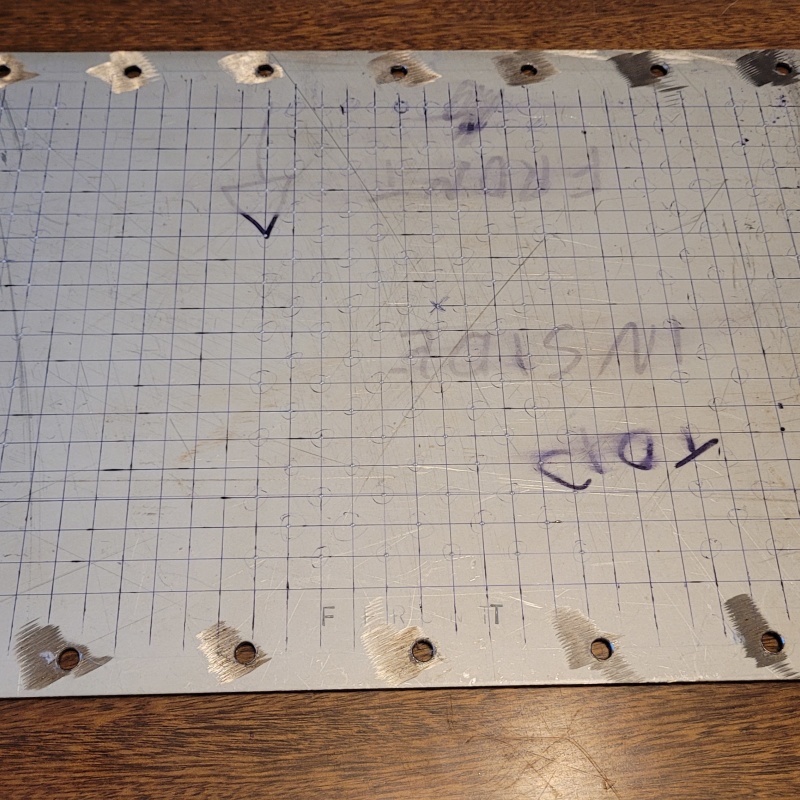
When I was cutting the sheet to make some brackets. I did some quick calculations in my head on the corner cutouts to work around the folds.
[image skipped]
It turns out my quick mental maths did not include all the relevant factors.
I will need to chop off another 20mm along the long axis at each end. Not a huge deal, 5 minutes with the jigsaw.
However this makes a lot of noise which means I can't do it in my evenings while the toddler is sleeping. Its a weekend only job. I was wanting to do quieter things like drilling and folder this evening.
measure twice cut once so they say....
Encouraging progress!
I too have some NOS CV4003 and others in the family stashed, along with some Mullard and Telefunken, although not bought from twl. Who doesn't seem to have anything listed now.
On an intended humourous note, have you actually tried the experiment to see if the infant toddler would awake? Supposition?
Maybe your wife could monitor while you did a few cuts. Would subconscious noise reception become something to be undisturbed by, or not. Become used to, is that good or bad? Maybe noise reception if it doesn't awaken could still be deleterious, or is it simply not noticed? Of course if it's not in a basement but rather in a nearby room, that might all be moot. And as a single chap with no children, purely speculative. ;-)
I'm a light sleeper for sudden noises, footsteps overhead, people talking in the carpark in the early am, sudden bangs or bad car stereo etc.
But rain, even thunder, surf, birds I can sleep through. And I don't find neighbours power tool use irritating during the day. Just thoughts! ;=})
Of course, it's great to have alternative quieter work to do anyway.
At least you checked afterward!
Cheers!!
"Work. I can listen to it all day!"
|
Post by sadface on Feb 23, 2023 7:13:36 GMT 12
I can get away with making a bit of noise in the basement.
Its not worth the risk at night however. We have enough fun trying to get her into bed in the first place so I wouldn't want to run the risk she wakes up.
I've had a few evening workouts cut short due to a stirring baby when I've made a bit too much banging in the lounge.
During her nap time is a different story. On the weekend when I am home for such things, I will often push the boundary after the first 30 minutes or so
|
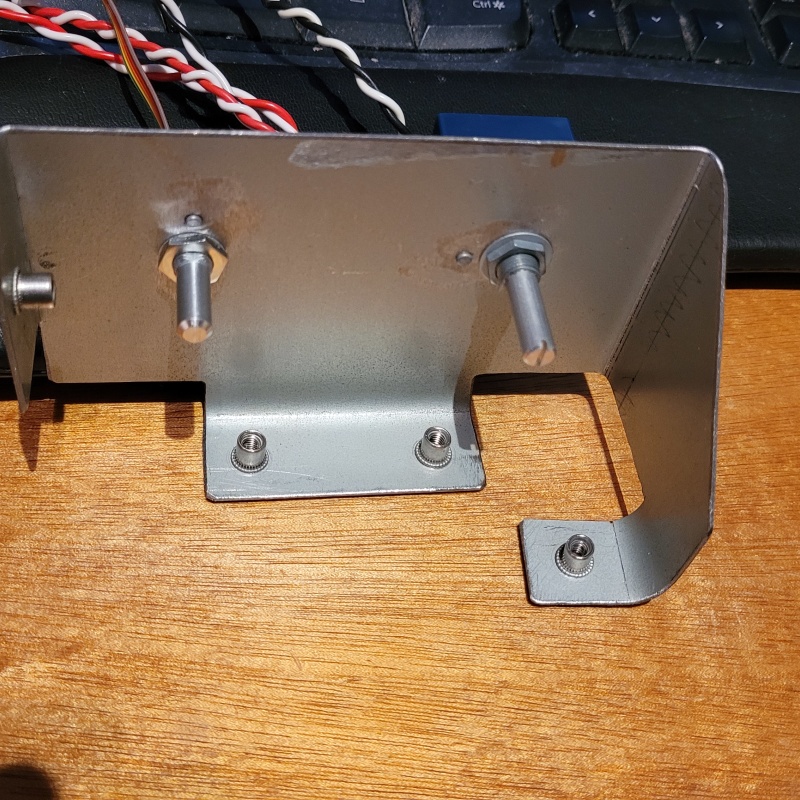
Post by sadface on Feb 26, 2023 12:18:48 GMT 12
I had an hour yesterday morning to get some work done.
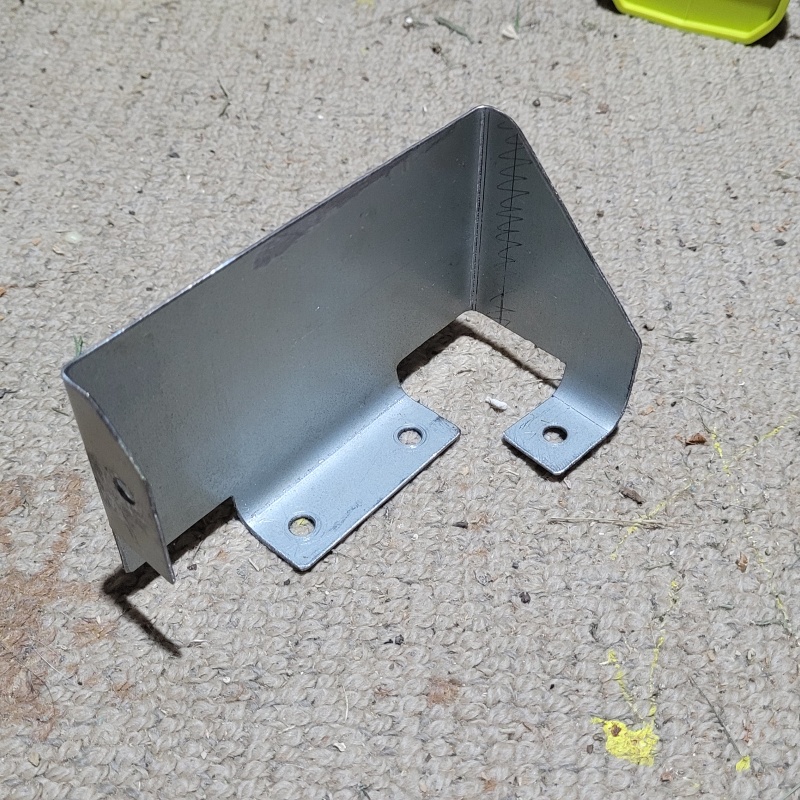
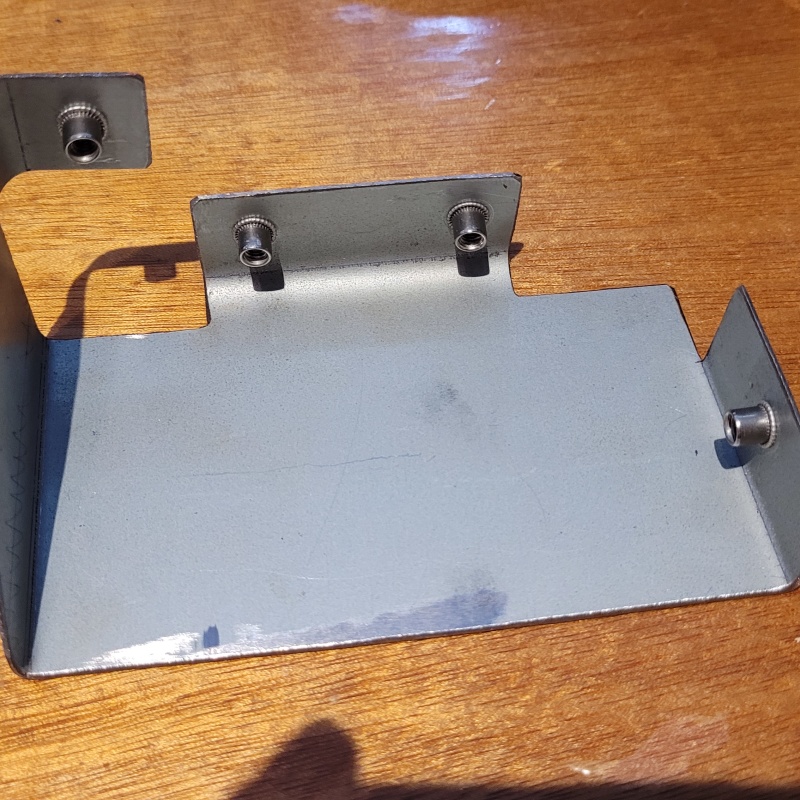
I made up the bracket/shields.
Cut
Drilled
Folded
Now for a test fit....
|
Post by sadface on Mar 3, 2023 21:17:49 GMT 12
G'day Guys,
A wee test fit was done.
I'm really happy with how it looks with the brackets in there.
Less good is that I need to do a bit more work. Due to a rounding error the brackets are about 2mm too short....
We'll see how I get on over the weekend with fixing this.
I have some plans.....
|
Post by sadface on Mar 6, 2023 19:55:08 GMT 12
G'day Guys,
Great progress over the weekend.
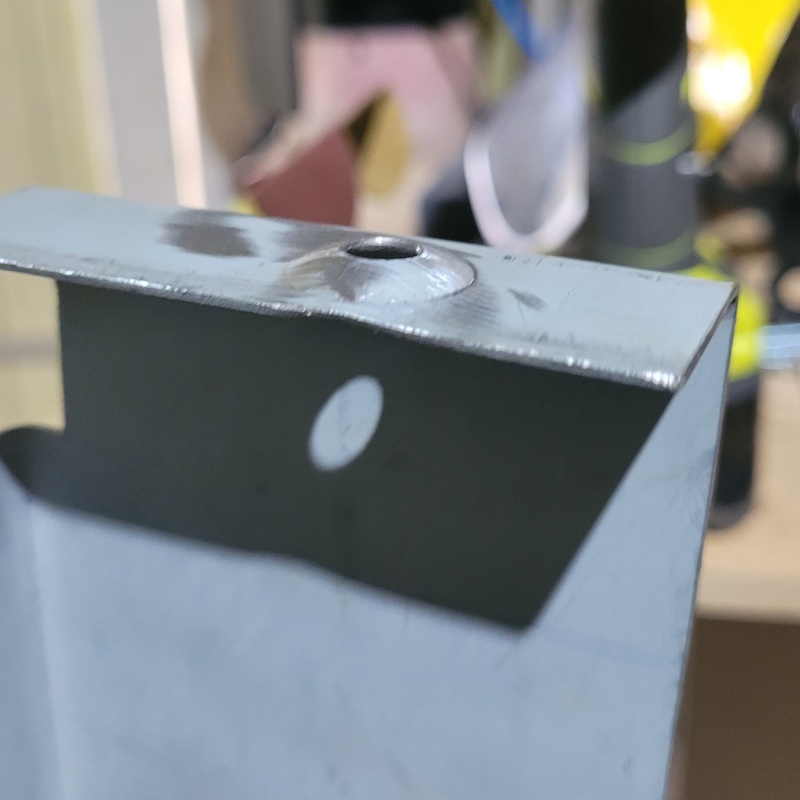
I made a makeshift dimple die to fix my mistakes.
Here's the result:
Installed.
All in all a very pleasing result.
I then went back and ground off all of the original aluminium rivet nuts and am in the process of replacing them with the same stainless steel ones from ali express that I have come to prefer.
After finishing that, I will move on to the next bracket! This one to hold the volume control and maybe the input selector switch.
|
Post by RdM on Mar 8, 2023 21:20:54 GMT 12
G'day Guys, Great progress over the weekend. I made a makeshift dimple die to fix my mistakes. Very educational, thanks!
I had to look up what a dimple die was. On a tangent from that, I found chassis punches. Like the old Greenlees I remember, but from NZ.
Does anyone know of as good or better alternatives?
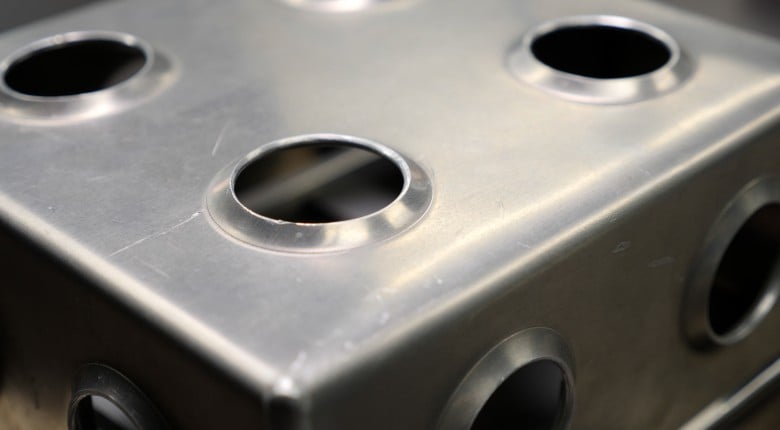
Anyway, interesting to learn of dimple die use in strengthening panels, as well as making more lightweight. And to view a tutorial, and more.
From that last, the head picture led me to think of a sculpted upward flare surrounding a (large) valve base, itself mounted below, for airflow strength & maybe beauty? ;=})) But perhaps better, more smoothly finished, and in thicker metal. Then again, it seems that only the small ones can be used with a bolt;- the larger ones needing a press. Still, just ideas. Maybe plain holes would be fine in thicker metal anyway. I'm ordering a step-drill set and a tungsten coated for metal hole-saw set, thinking about future valve chassis work.
Cheers!
|
Post by sadface on Mar 9, 2023 7:23:50 GMT 12
|
Post by RdM on Mar 10, 2023 21:00:10 GMT 12
Thanks! I hadn't thought to look at Bunnings. 30mm gets close to a loctal or octal socket eyeballing it.
I ordered this set, it doesn't go so wide, so that cheaper one to 30mm looks like a good addition.
Still thinking about hole saws. I have a small set with a couple of arbours, not sure how good with or meant for metal, I've only used on wood so far.
Bunnings have cheap sets and individual expensive ones. Maybe the latter for a large valve like say 813. The same chap has a small set like this:
I'm mainly only thinking of potential future holes for valve sockets here, but of course all the smaller holes for input output switching & etc. are needed too.
An IEC socket pattern punch might be unlikely;- drill and file out? But some of the chassis I've saved already have them, and fuse holders too.
Which is partly what's attractive about recycling them. ;=})
|
Post by sadface on Mar 12, 2023 20:13:08 GMT 12
Some great progress this weekend and a rather annoying set back.
I had an hour on Saturday morning and I managed to get the bracket for the volume control pot sorted. Cut
Drilled
Folded
Test fitted
Rivet nutted.
Some of the bend radii are a bit off as I had to do this bits in a vice instead of the bender as I got the bend order wrong..... Not a huge deal, it affects the aesthetics but not the function so I will let it slide.
All was going well. Until this morning my M3 rivet nut mandrel broke when attempting to use a stainless steel m3 rivet nut.
So now I am held up somewhat while I wait for Bunnings to give me a quote on a replacement m3 mandrel, goodness know how long that will take to arrive its not prohibitively expensive....
In the mean time I can continue on with the volume pot and front panel stuff. This simply holds up various bits to do with the back panel.
More on the front panel later....
|
Post by sadface on Mar 13, 2023 19:30:30 GMT 12
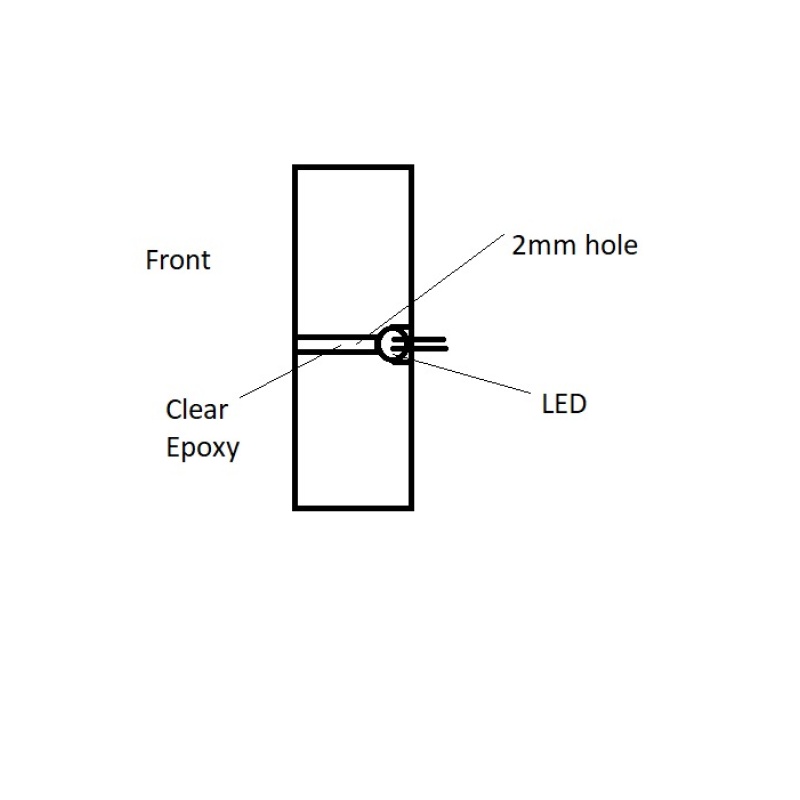
One issue that has been occupying my mind for a few months has been how I am going to mount the source selector LEDs in the front panel.
One can buy panel mount LEDs however they won't work in a 30mm thick piece of wood, they are designed for something like a 2mm piece of steel.
The other problem is that I don't think the chrome bezel is going to suit the rest of what I plan on the front panel.
Here is what I've been thinking of for a while
Drill a small hole through and fill it with epoxy from the front with the LED mounted into the back of the wood. The theory being that the LED would shine through the epoxy.
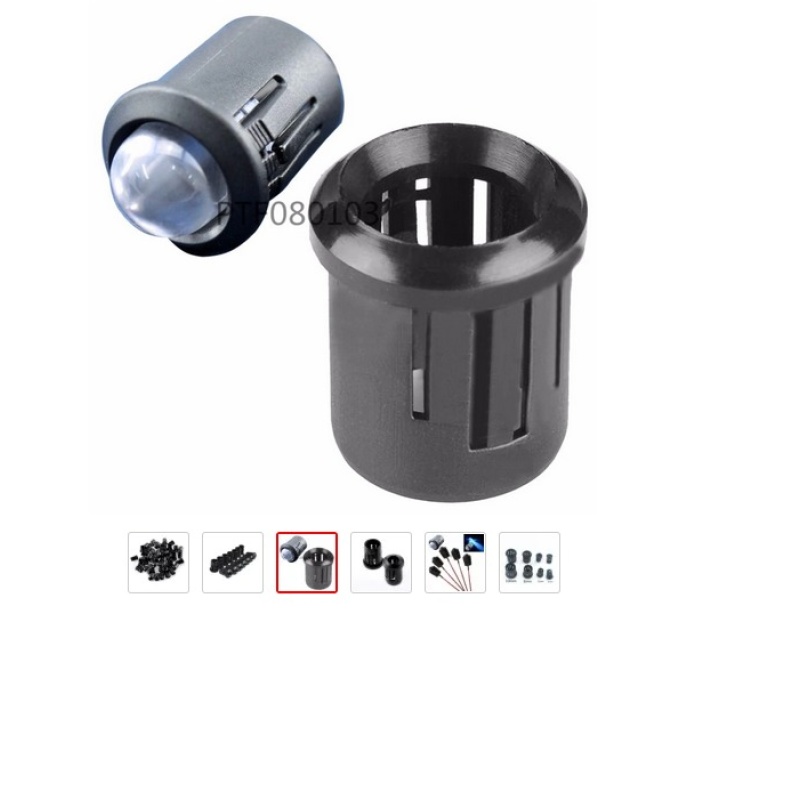
Another option I have discovered is that there are small plastic clips which simply hold an LED.
These have a few advantages: firstly they are very cheap. $4 for 50 including shippping. Secondly the black plastic bezel will actually match my power switch.
I've got some of the panel mounts on order to see what they look like. It is starting to look like a good option.
|
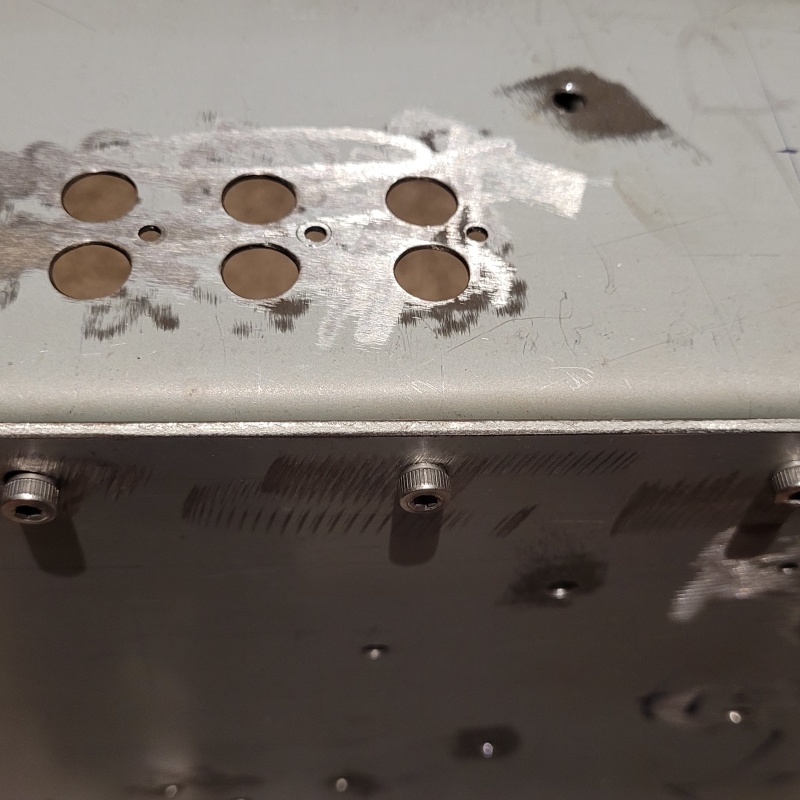
Post by sadface on Mar 14, 2023 20:42:30 GMT 12
For once I managed to to get my hole centres EXACTLY where they are supposed to be!
The volume pot is all nicely fitted now.
Onto the source selector switch now.
|
Post by colinf on Mar 18, 2023 6:55:26 GMT 12
Looking good. If you have any, use some shielded wire from the volume pot wiper to the pcb.
AMR-iFi R&D
|
Post by sadface on Mar 18, 2023 21:04:19 GMT 12
Hi Colin,
Would that be superior to cat5 these for signal wire?
|
Post by RdM on Mar 18, 2023 21:15:14 GMT 12
Hi Colin, Would that be superior to cat5 these for signal wire?
I'd say yes, ideally twisted wire with a shield, grounded at one end only. But you can get braided shielding tubes of various diameters. I salvage. You could slip some on if you hadn't connected the pcb ends yet.
Else start again?
[Edit]
Maybe if shielded it doesn't even have to be twisted? But maybe both is good.
|
Post by colinf on Mar 19, 2023 7:38:06 GMT 12
The category (5, 5e, 6 etc) doesn’t matter for audio, more the shielding. The 100k pot has a maximum 25k output impedance (2 x 50k || ) so just trying to minimise any external capacitive pickup from the input signal to the pot next to the output from the wiper. The compromise from an unshielded cable is loss of channel separation at high frequencies, and/or increase in RF from the input signal, if present. As the casing is metal and is grounded, the risk may be small. Twisting the wires is good!
AMR-iFi R&D
|
Post by sadface on Mar 20, 2023 20:38:48 GMT 12
G'day Guys,
Huge progress over the last week or so.
The rotary switch for the source selection is mounted.
The input board is all drilled with everything fitting nice. I didn't get a photo while the board was test mounted. I've taken it back out again as currently the holes are 10mm however I've measured some commercial amps and they all use 11mm holes to mount PCB mount RCA sockets so I think I will do the same. I am guessing this is to make sure the end of an RCA connector doesn't foul on the chassis. I will post another photo once i've drilled these out the extra 1mm.
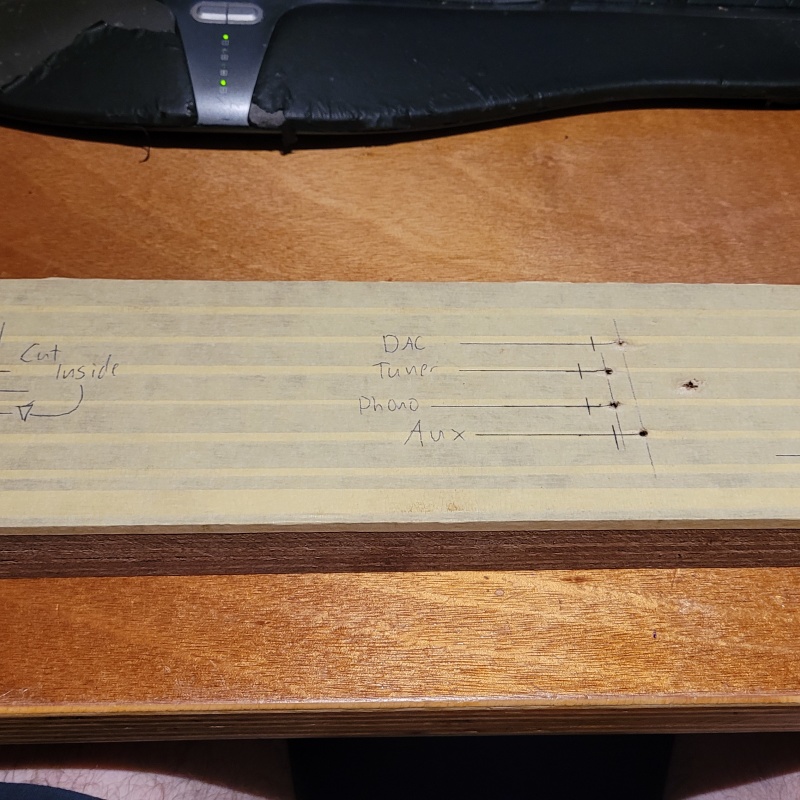
I've stated work on the front panel. The holes for the volume pot and source selector shafts are drilled out to 6mm. LED holes are drilled out to 3mm so far. I'm waiting on the black plastic LED mounts before going on further with these. The power switch socket is all ruled out ready for some drilling, cutting and chiseling. I have a plan now for how I will do the job of labeling everything.
The top panel is ready for drilling. It took me half an hour to rule out the 10mm by 10mm grid. A further half an hour to centre punch the 183 holes (plus an extra that I have to avoid drilling)
I'm waiting on some more rivet nuts to arrive which is holding some things up, hence why I've started on the front panel and the top panel. We'll see how long it takes me to get the top panel vent holes all drilled.
|
Post by RdM on Mar 23, 2023 18:38:55 GMT 12
A suggestion - instead of all the grinding or filing around holes, which leaves ugly marks, although perhaps you have a plan to obscure them later? - and I only recently clicked that presumably this was likely in the cause of de-burring the hole edges - you might look at acquiring some deburring tools, hand held or even motorised?
Cheers!
|